Posting from MarsEdit

I’m still slacking off on my hope to do a better job with keeping a presence online. I need massive simplicity, and as much as I dig WordPress, I don’t find the workflow intuitive. So, on my quest to find the simplest, easiest editor that will let me publish posts quickly, with relatively rich content, I continue to stumble around. Nothing out there does exactly what I want. And frankly, this is just not anywhere near representing a high priority. Blogo was easy to use, but they died. I’m not sure where they went? IFTTT supports an automatic hook to allow a new Evernote post to post to WP, but not a self-hosted WP blog like this. I am close to just giving up and editing directly on the WP interface. Given the great functionality that Project Gutenberg has given to WP users with Blocks, that’s not really a bad option. My bit of frustration comes just with dealing with media files, mostly images.

So, checking out MarsEdit, available on the App Store. Do not let the free price to download and install fool you. It’s free with complete features for 14-days, then your ability to publish content is disabled. To continue, you must pay $49 for a full license.

Here’s the interface running on my Mac in Dark Mode. You can see it fully supports Dark Mode in Catalina:

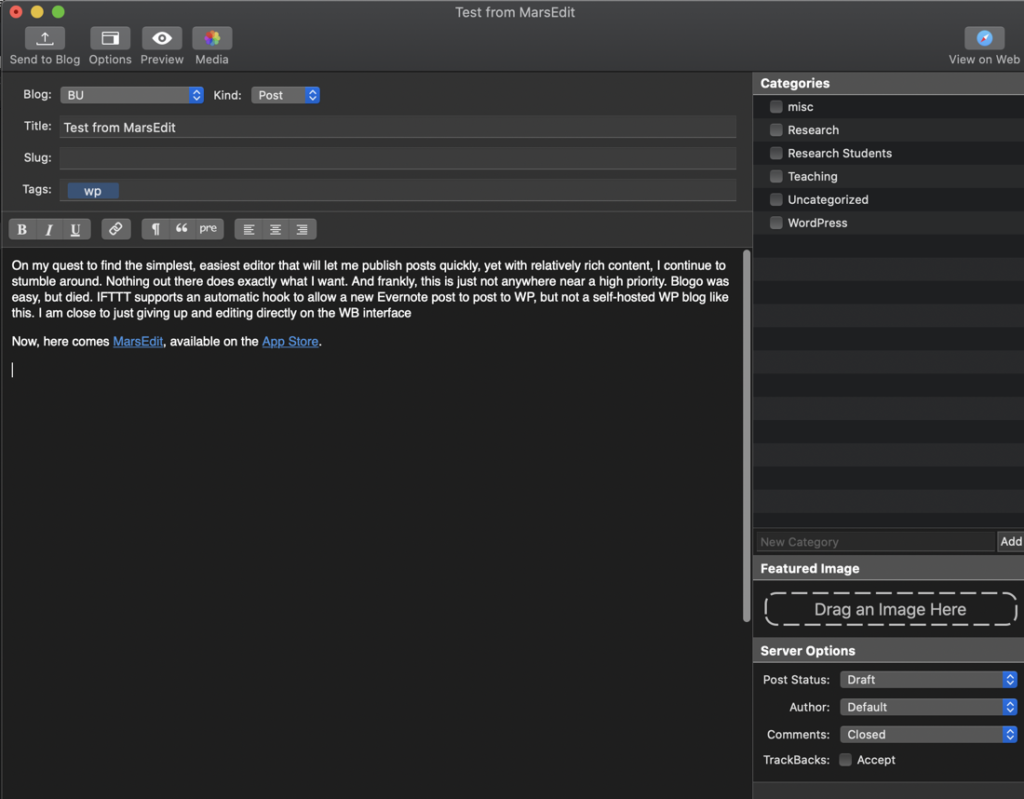
There are also options to edit your slug, tags, select the WP categories this post is assigned to, select your featured image, and other server options to set your post status, author, whether comments are closed, etc. Overall, it seems quite simple. But, I mostly care about editing. You can see above it’s a basic functional rich-text editor. It supports the most common formatting commands.

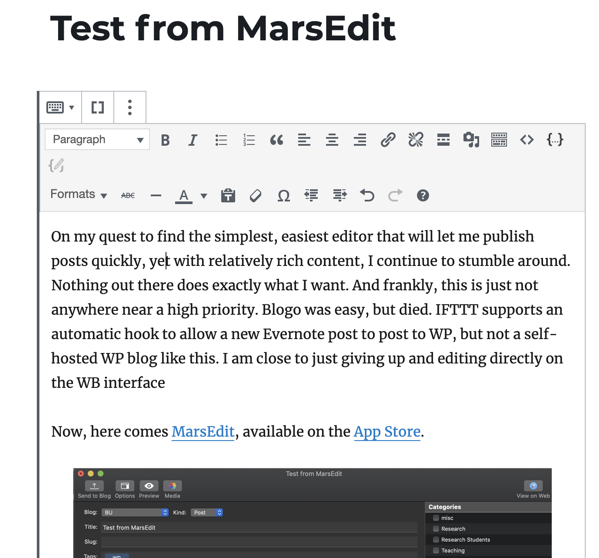
Yet, we know that WP has made a substantial commitment to its Project Gutenberg – their new Blocks editor. So, what happens when you publish a brand new post? It comes up in “classic” mode when you open your post in WP:

I can attempt to convert my post to Blocks…

MarsEdit_convert_to_blocks

but sometimes it results in no change, and leaves your post in classic mode. Other times, it does indeed work. I’m not certain what the triggers are that prevent your post from converting to separate blocks, though this is not a big deal to me.

At first glance, this tool seems a bit pricey. However, the workflow I need to quickly publish updates from my Mac with minimal effort is definitely there. I might adopt this. Why? There are two tools I rely on extensively when writing documentation – quick screen captures, and recording quick little GIF animations. Having to save a file, upload it to my Media, and then reference it, is an absolute pain.

I’ll try this for a bit…

Including a Jupyter Notebook file on WordPress

I’ve been exploring different mechanisms to post Python Jupyter notebook files on WordPress. Of course, I can use nbconvert to convert my notebook files to other formats – including HTML – right from the command line. I can then post this file as part of an embedded HTML block in a WordPress post. However, this sounded like an unnecessary step, since I also wanted the notebook to be available in GitHub. I did not want to deal with generating this HTML file AND also managing a published notebook on GitLab as well. Smells a lot like duplicate efforts, wasted time. Thanks to a great WordPress plugin from Andy Challis, called nbconvert, I was able to achieve what I wanted! See his page at https://www.andrewchallis.co.uk/portfolio/php-nbconvert-a-wordpress-plugin-for-jupyter-notebooks/ for complete instructions.

  1. If you haven’t yet, you must install WP Pusher as a plugin in your WordPress site. (See this for more info.)
  2. Go to his web page for nbconvert, copy the CSS custom code displayed on the page.
  3. Go to your WordPress page, and add the custom CSS displayed on the page above into Appearance -> Customize -> Additonal CSS
  4. Go to https://github.com/ghandic/nbconvert and verify the latest instructions. Install the nbconvert shortcode plugin through WP Pusher. Activate it.
  5. That’s it!

Follow the instructions to include your own Jupyter notebook file available on GitHub.

Example

Here is an example. In a standalone text (or paragraph) block, I included the following shortcode:

[nbconvert url="https://github.com/bkingcs/python_snippets/blob/master/clustering/hierarchical.ipynb" /]

This generates the following:

Moving to WordPress

So, you’re interested in contributing some code back to the wonderful Internet community. Well, your first stop should surely be Github. If you’ve been a student in Computer Science, or pretty much any discipline where you need some code or libraries to accomplish some task, then surely you know that 1) Github is your primary go-to, and 2) you better have set up an account, and started sharing some examples of code for your future employers and collaborators to see what you do.

For some of us, however, we want access to a platform that can give us a bit more flexibility to be able to be a bit more reflective and educational with the code we share, and not simply just share code. And, of course there are dozens of options out there for doing that as well. For me, I spent years just managing my own site using Adobe Dreamweaver. However, it was becoming a bit overkill for what I was trying to achieve. I’ve used WordPress for various classes I teach, but not for my own endeavors. Well, as of 2019, that has changed. I narrowed down my search between Medium and WordPress, and concluded that both would have worked. However, I ultimately decided on WordPress due to convincing myself that it had a bit more flexibility to do some cool things.

Plugins

At some point, I’ll start a log of plugins I use…

There is one plugin that is one of my favs…

WP Pusher

One plugin I’ll mention right off the bat is WP Pusher. While WordPress manages a pretty rich set of plugins, some developers have complained that it takes a bit of time to get their plugins available through their API. Also, you’ll quickly notice that there are a lot of outdated plugins still available that may not necessarily work properly on your version of WordPress. Instead, you can deploy plugins directly from GitHub, Bitbucket or GitLab.

It’s quite simple to install WP Pusher:

  1. Go to WP Pusher
  2. Download the zip file (wppusher.zip).
  3. Go to your WordPress dashboard, and select Plugins -> Add Plugins -> Upload Plugin. Upload your zip file.
  4. Activate it!

You should now notice that you have a new menu item available called WP Pusher.

That’s it! Find a WordPress plugin on GitHub, and readily install it using WP Pusher! All plugins you install and activate from WP Pusher will then be available and managed from your standard Plugin interface. Very cool.